
When decorating, I don’t want to get locked into a look for too long a time as I tire easily. Like with my window treatments, I change them fairly often which allows me to change the vibe the room. That is the great thing about DIY window treatments. It’s always a fun project and you can change the look when it suites you because you haven’t invested too much. Here a some photos of my ever changing mud room window treatment.
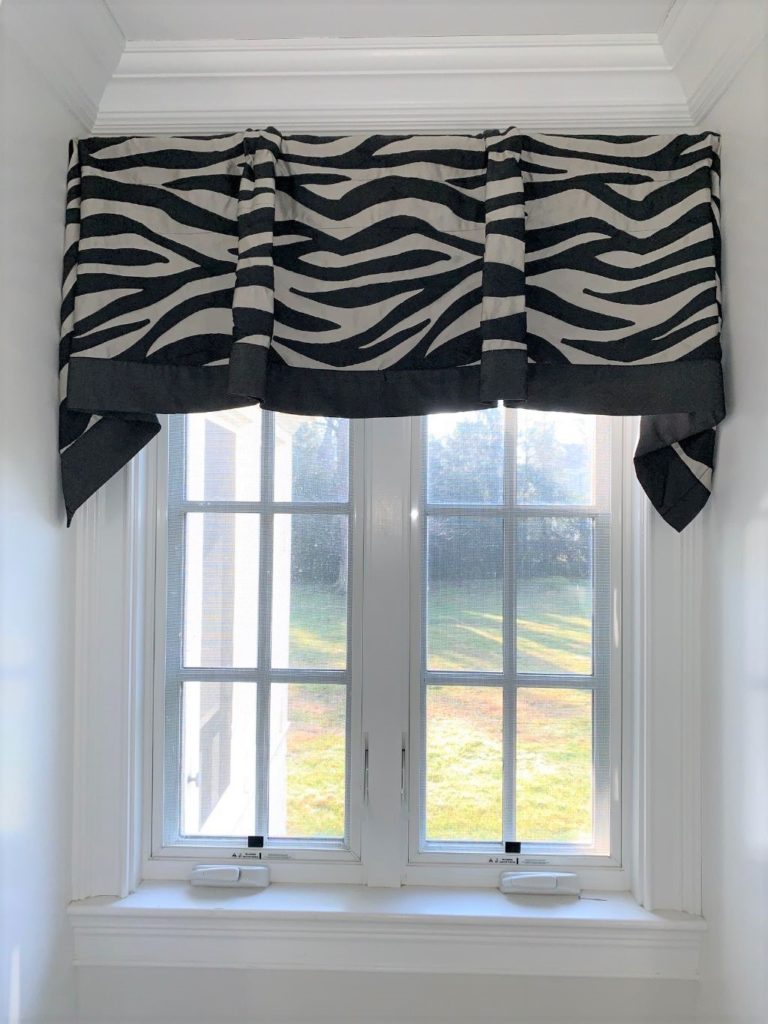
Mock Roman Balloon Shade
This was created from one folded table cloth. I simply folded the length in half, right sides out. Then I draped it over the tension rod which was between my mudroom cabinets. No rod pocket needed! I could have easily cut the length down and decreased the fabric width, but I worked with the size I had to keep it simple. First. I gathered the excess fabric at the ends. From there, I fan-folded the bottom into about four, 3 1/2″ folds. I measured in a few inches from the wall so it was equally spaced on both sides, then pinned the folded fabric in place using T-pins. Finally, I used drapery tiebacks to accent the gathered portion. You can use any type of tie, ribbon, or cording.
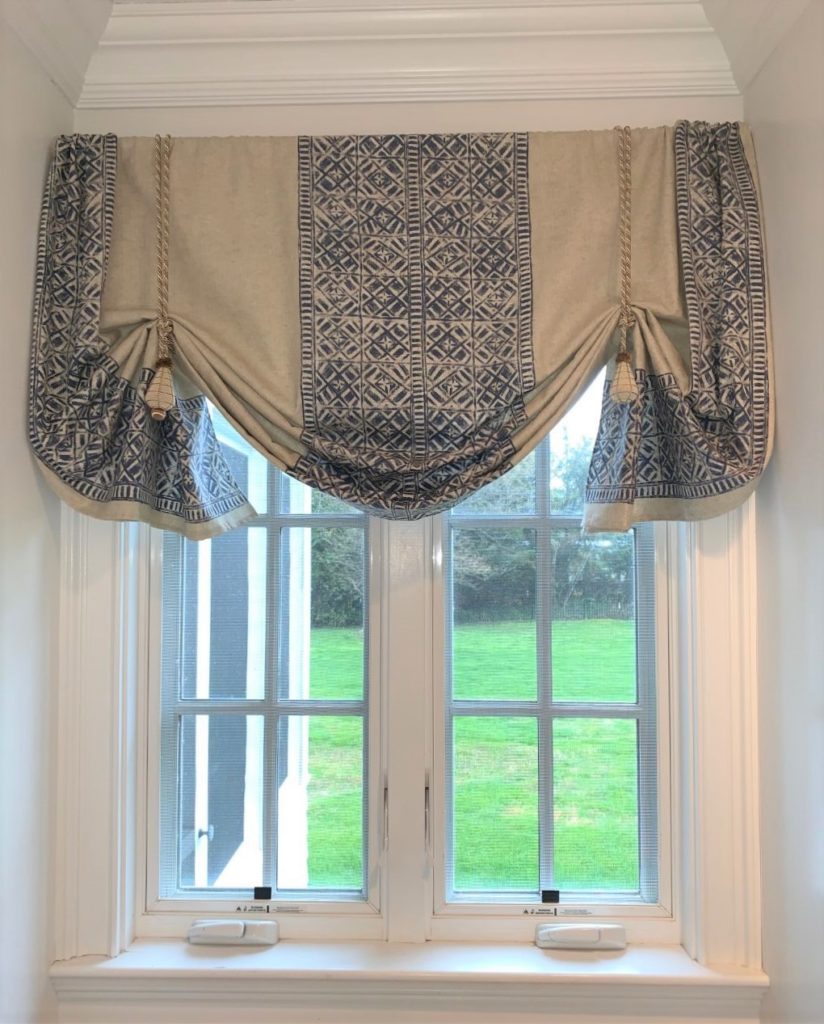
Empire Valance
This was created out of a rod pocked valance that was meant to be gathered all the way across a drapery rod. Instead, I made it look more custom by only gathering the fabric at evenly spaced intervals. I let the ends hang down so they were not shirred on the rod. Then I fan-folded the tail ends to create the look of jabots.
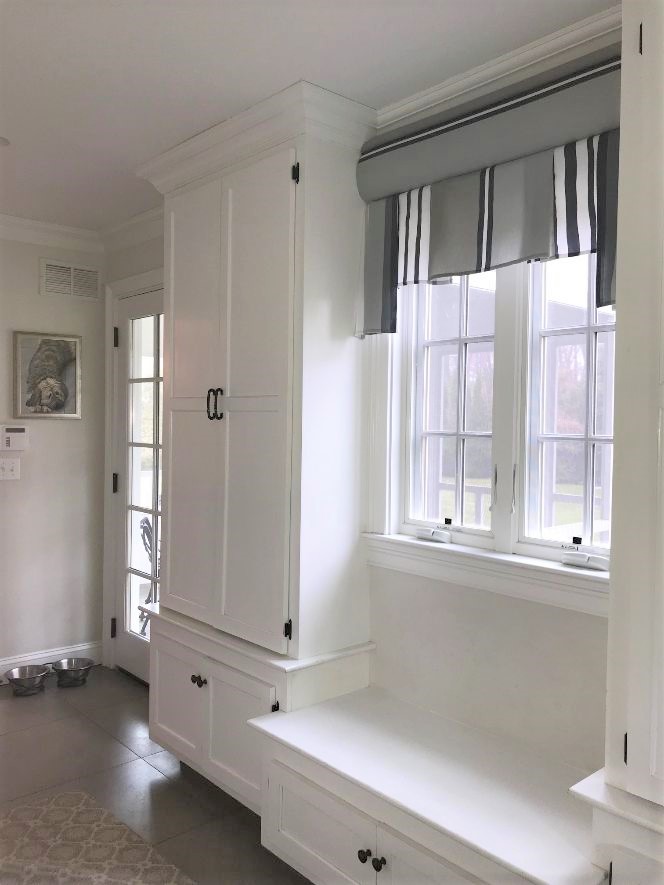
Deco Wrap Cornice
Here I used a Deco Wrap cornice form. The body fabric is tucked around the main foam form. Then for the skirt, I used one larger fabric piece for the center portion, and two longer lengths for the sides. The raw edges of fabric are tucked into the horizontal slit which runs across the back of the Deco Wrap form.
That’s it for now but I’ll keep you posted when I change it again. Happy Decorating!